Set up your shop
The three onboarding steps — shop details, your services, and a plan.
Onboarding is three steps. You cannot skip one, but you can leave and come back: BarberNexa remembers where you stopped and puts you back on the same step.
Step 1 — Your shop
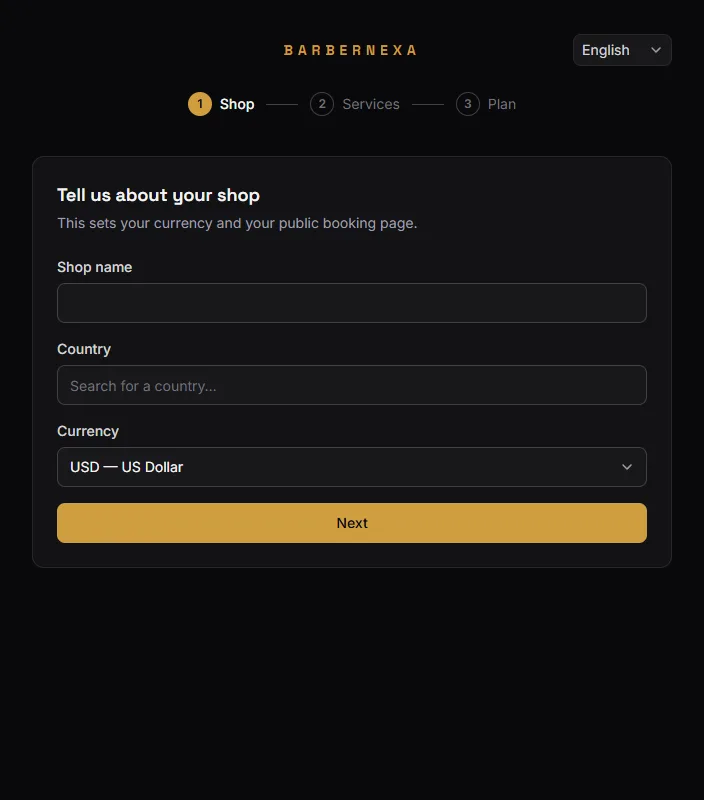
Shop name. What customers see: on your booking page, in confirmation emails, and on the rating link.
Country. This picks your currency and decides what your address form looks like later (State vs Province vs Department, ZIP vs Postal code).
Currency. Pre-filled from the country, and you can change it here. Every price in the app — services, tickets, dashboard, exports — is shown in it.
Your time zone is read from the browser, not asked for. It is what makes "today" mean today at your counter: turn numbers reset on your local morning, and appointment times are your wall clock, not the server's.
Your public booking link is built from the shop name at this moment, once. Renaming the shop later does not change the link, so customers and printed cards keep working. Get the name right here if you care what the URL says.
Step 2 — Your services
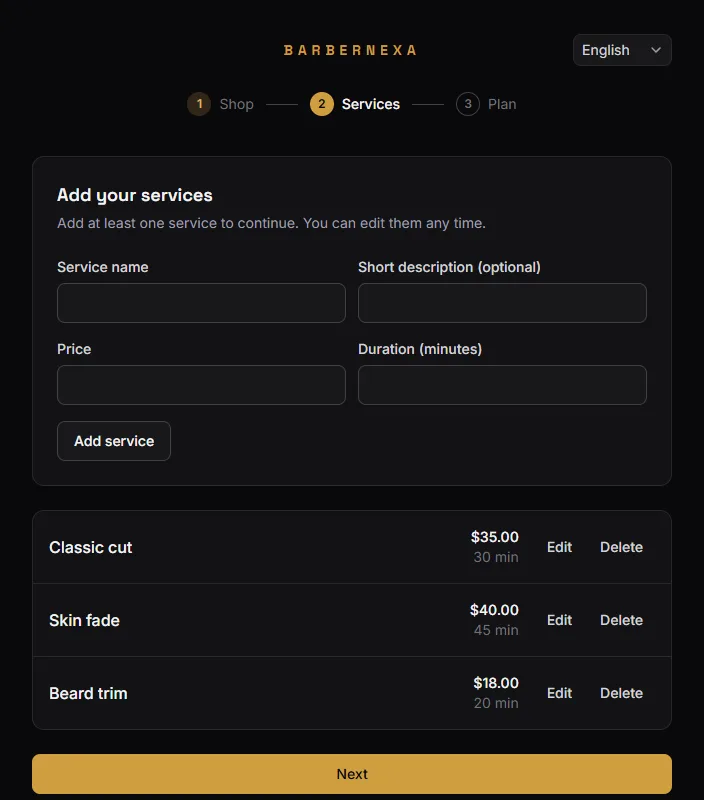
Add at least one service to continue. Each one needs a name, a price and a duration in minutes; a short description is optional and shows up on the booking page.
Two things that matter more than they look:
- The duration is what your booking page uses to work out free times. A 30-minute cut and a 20-minute beard trim booked together need 50 minutes of a barber's day. Guessing low here will overbook you.
- The price is a reference, not a fixed amount. You can change what you charge on any individual visit without touching the catalog.
You are not locked in. Services, prices and durations covers editing, disabling and adding photos later.
Step 3 — Your plan
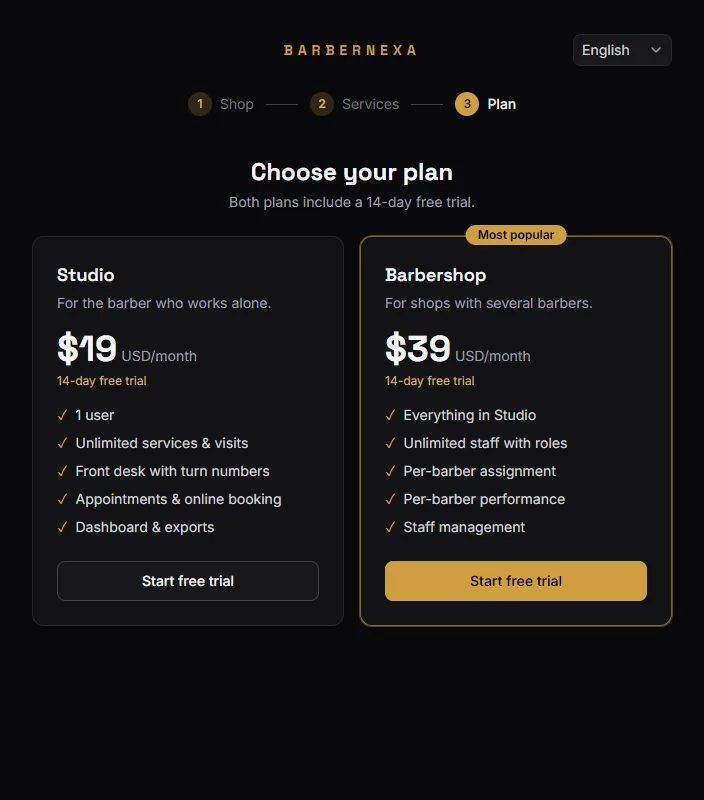
Pick Studio (one barber) or Barbershop (a team). Both start with a 14-day free trial.
Checkout is handled by Stripe. A card is required to start the trial, nothing is charged for 14 days, and you can cancel any time before it ends.
If checkout is canceled or the card is declined, you land on a "Payment not completed" page. No charge was made; Back to plans returns you to step 3.
After onboarding
You land on the dashboard with your booking link ready to share. Your first day walks through what to do next.
Your address, weekly hours, logo and booking-page preferences are not part of onboarding — they live in Settings, and the defaults work until you get to them.